A monitor arm is not automatically compatible with every monitor or desk. Before buying, check four things: the monitor’s VESA mounting pattern, its weight without the stand, the arm’s capacity for your exact setup, and whether the arm’s clamp or grommet hardware fits your desk. Screen size alone cannot confirm a fit. If those details match the manufacturer’s specifications, an arm may work even if it is not made by the monitor’s brand; if one does not, an adapter or a different mounting style may be needed.
The quickest way to decide is to find the monitor’s model number, look up its specifications, and compare them with the exact arm model and mounting kit—not just a product-family headline. Desk and Day’s monitor-arm selection guide covers broader buying considerations; this guide focuses on whether a particular arm will fit.
Featured image: “monitor arm for the TI’s LCD” by blakespot, source photo on Flickr, licensed under CC BY 2.0. Resized and padded. Illustrative stock photo; no product testing is implied.
Check the VESA pattern first
VESA is a standards organization whose site lists a Mounting Standard. For practical compatibility, the monitor’s own specifications should state whether it has a VESA mount and give the pattern, such as 100 × 100 mm. For example, BenQ lists a 100 × 100 mm VESA wall mount for its GW2480 monitor (BenQ specifications). The two measurements describe the spacing of the mounting holes across and down the back of the display; the arm’s plate must match that pattern.
Look up the full monitor model number, including any letters or suffixes, and search its manufacturer’s specifications or manual for “VESA,” “wall mount,” or “mounting interface.” If the information is unclear, inspect the back of the monitor for four threaded mounting holes and measure their horizontal and vertical spacing center to center. Do not assume that a similar-looking monitor in the same product line has the same pattern.
Also verify the attachment hardware. A matching hole pattern does not by itself confirm that the included screws are the right length or thread for the display. Use the monitor and arm instructions, including any specified spacers, and do not force a screw that does not turn easily. A wrong screw can damage the monitor.
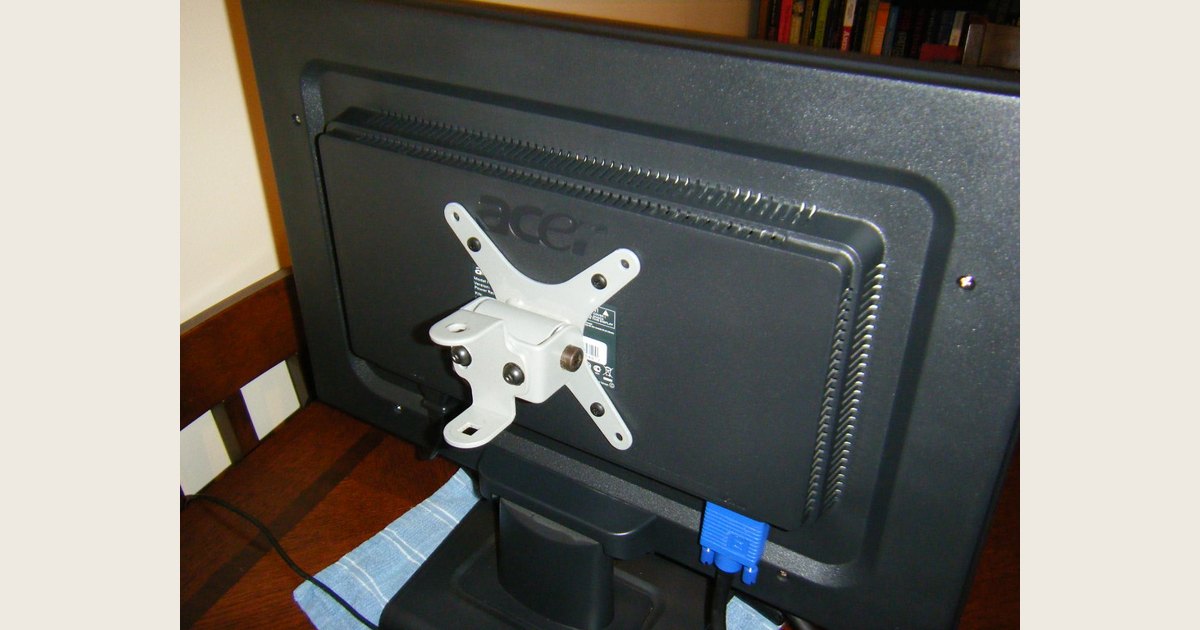
The pictured rear mounting bracket illustrates one part of compatibility: the monitor’s mounting pattern and the arm’s desk attachment both need to match. Illustrative stock photo: “Mount, Monitor; Monitor, Mount” by imjoshdotcom, source photo on Flickr, licensed under CC BY 2.0. Resized and padded; no product testing is implied.
If a monitor has no VESA holes, check whether its manufacturer offers an approved adapter for that exact model. Confirm the adapter’s compatibility and include its weight when checking the arm’s load range. Avoid improvised plates or attachments that leave the display insecure.
Match the arm’s weight range to the monitor
Compare the arm’s stated supported weight with the display’s weight in the configuration you will actually mount. In most setups, that means the monitor without its factory stand, since the stand is removed. BenQ, for example, lists the GW2480 at 8.46 pounds net and 6.7 pounds without its base (BenQ specifications). Use the manufacturer’s figure for the monitor without its stand rather than assuming the total shipping or stand-included weight is the right number.
Check both ends of the arm’s supported range. An arm can have a maximum load and a minimum load; a display that is too heavy or too light for its adjustment mechanism may not stay where you position it. If the monitor will carry an accessory on the arm, such as a camera or light, check whether its weight counts toward the supported load and include it as directed by the arm maker.
Read the rating for the exact configuration. A product line may have single-monitor and dual-monitor versions, different bases, or optional crossbars with different limits. For example, Humanscale describes its M8 Pro as supporting a single monitor from 9 to 50 pounds, or two monitors up to 12 pounds each with an optional crossbar; it separately lists an M8.1 quick-ship clamp configuration for one monitor up to 28 pounds (Humanscale M8 Pro details). These are examples for specified configurations, not universal ratings for monitor arms.
For a dual setup, confirm whether the stated limit is per screen or combined, and check the permitted load for each arm or crossbar. Do not divide a single-arm maximum by two and assume it applies to a dual mount. If the maker’s listing and manual appear to differ, use the instructions for the exact model and contact the maker before mounting.
Make sure the desk and mount agree
A desk mount needs a suitable attachment point as well as a monitor that fits. For a clamp, measure the desktop at the exact edge where the base will sit. Compare its thickness and shape with the clamp’s published fit range. Check underneath for an apron, drawer, frame, cable tray, or other obstruction, and confirm that the clamp can sit flat on both sides of the desk. A rounded or beveled edge may not give a clamp the contact it needs even when the desktop is within the listed thickness range.
Desk construction matters, too. A clamp concentrates pressure in a small area. Check whether the top is solid, hollow-core, thin, damaged, or made of a material that the desk or arm maker excludes. Follow both manufacturers’ instructions about reinforcement plates and acceptable surfaces. Do not assume a reinforcement plate makes an otherwise unsuitable or fragile surface safe, and do not clamp to glass unless the desk and mount makers expressly approve that setup.
A grommet mount attaches through a hole in the desktop. Check the mount’s required hole diameter, desk-thickness range, underside clearance, and included hardware. A cable-management opening may be too large, too close to an edge, or surrounded by a removable plastic fitting that is not intended to support a mount. Do not treat every cable hole as a suitable mounting hole; verify the dimensions and construction first. If drilling a new hole, check that you are allowed to modify the desk and that no frame or wiring is in the way.
| Mounting style | What to check | Main tradeoff |
|---|---|---|
| Clamp | Edge thickness and shape, flat contact, underside clearance, and desk construction | Usually avoids drilling, but needs an accessible, suitable edge |
| Grommet | Hole diameter and location, desk thickness, washer/base fit, and underside clearance | Can work away from the edge, but needs a correctly sized, structurally suitable through-hole |
Neither style is universally better. Choose the one that your desk and the arm’s supplied hardware explicitly support. If the desktop flexes, cracks, or shifts as you position the monitor, stop and reassess rather than tightening the mount further.
A practical compatibility checklist
Before ordering or installing, gather these details:
- Monitor model: Use the full model number to find the manufacturer’s manual or specifications.
- Mounting pattern: Confirm the VESA dimensions and whether the arm plate supports that pattern. Check for a model-specific adapter if there are no mounting holes.
- Mounted weight: Use the monitor weight without its stand, then account for any adapter or attached accessory as the manufacturer directs.
- Arm configuration: Verify the exact arm version, its minimum and maximum supported weight, the number of screens, and any configuration-specific limit.
- Desk attachment: Measure the clamp location or grommet hole. Compare dimensions, surface shape, material, and underside clearance with the mount instructions.
- Screen clearance: Check the arm’s reach and any published screen-size limits, especially if the display is unusually wide or deep. Confirm that it can move through the intended range without hitting a wall, shelf, or second monitor.
If one item is unknown, pause and find the model documentation before installing. The terms “universal,” “fits most,” and a screen-size range are not substitutes for checking the actual VESA pattern, load rating, and desk hardware.
Why a monitor arm may not fit—or stay put
If the mounting plate will not line up, recheck the VESA pattern and the monitor’s exact model; do not attach it using only some of the required screws. If the plate fits but the arm droops or rises on its own, the load may be outside the arm’s range or its tension may need adjustment. Follow the maker’s adjustment instructions instead of tightening parts at random.
If the clamp will not close or sit level, look for an edge that exceeds its fit range, a desk apron, or an uneven surface. If a grommet bolt cannot pass through or the base cannot sit flat, the hole or desktop may not match that mounting kit. A wobbly desk is a separate issue from a loose arm: check the desk and mount instructions, and do not keep using a connection that shifts or damages the surface.
So, are monitor arms universal?
No. Many arms use standardized mounting interfaces, and a brand match is not usually the deciding factor, but compatibility still depends on the exact VESA pattern, monitor weight, arm configuration, and desk mount. Verify those details against the monitor manual, arm specifications, and desk construction before you buy or install. If the numbers or mounting instructions do not clearly agree, ask the manufacturer rather than relying on screen size or a broad “universal fit” claim.